Tuesday, August 28, 2012

CORRECTION: Sizes of pieces for purse....omitted, sorry !

Ok, can't say I didn't warn you about it not being an actual
 tutorial, LOL !!

The pieces (two fabric sides; two lining sides; two batting
pieces and two interfacing pieces) are cut thus:

14" wide X 12" tall (then the bottom corners are notched
out at 2" X 2" square.

If I left anything else out or its unclear; please just ask, lol.

Me no tut writer, (grinning) !

Judy's Basic Purse Pattern & Instructions

Sorry some of the pictures are a big on the fuzzy side; not sure what happened, lol.
But here is my attempt at a tutorial for those who have asked how I make my bags and
if I have a pattern.

Not sure that I would even call it a tutorial but I think you can probably follow it if
you want to give it a try.

Mainly, just have fun!!

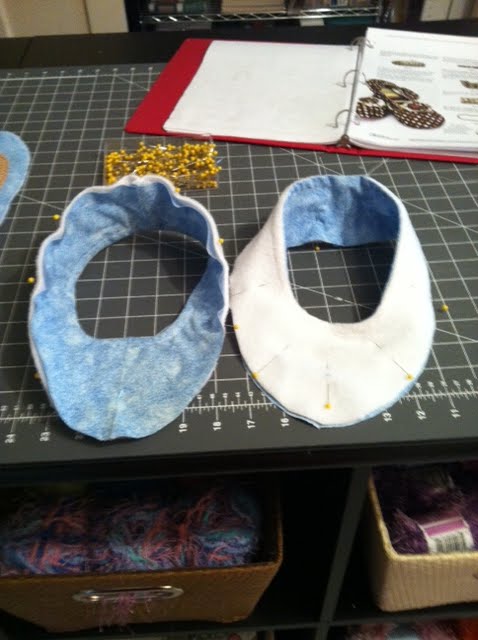
EXTERIOR WITH INTERFACING ATTACHED

LINING WITH BATTING ATTACHED AND POCKET 

COMPLETED INSIDE WITH POCKETS AND TRIM APPLIED

COMPLETED PURSE WITH STRAPS AND TRIM

BEADWORK-1


PURSE  BY  JUDY

SUPPLIES:

PURSE REQUIRES 1/2 YD OF EACH OF 
THE FOLLOWING:

FABRIC FOR OUTER PURSE
INTERFACING FOR OUTER PURSE FABRIC
FABRIC FOR LINING AND POCKETS
BATTING FOR LINING AND POCKETS

TRIM REQUIRED (IF DESIRED)
 ABOUT 3/4 YD

INSTRUCTIONS FOR ASSEMBLY
      

PURSE EXTERIOR:

1. PIN  INTERFACING  TO WRONG SIDE 
   OF FABRIC AND ZIG ZAG ALL EDGES


2. RIGHT SIDES TOGETHER, SEW ½ INCH 
BOTTOM SEAM AND PRESS SEAM OPEN

3. RIGHT SIDES TOGETHER,  SEW SIDE
    SEAMS  5/8”  AND PRESS OPEN

4. MATCH UP NOTCHED OUT CORNERS AT 
    BOTTOMS ( PIN AT SEAM ALLOWANCE
   TO LINE UP) AND STITCH ½ INCH SEAMS.
   TURN SHELL OF PURSE RIGHT SIDE OUT

PURSE INTERIOR:

5. PIN BATTING TO WRONG SIDE OF LINING
   AND ZIG ZAG  EDGES

6. . MAKE POCKETS BY CUTTING (ON THE 
      FOLD) TWO PIECES OF LINING FABRIC 
     MEASURING 14" WIDE X 6" TALL. PLACE 
     RIGHT  SIDES TOGETHER & FLEECE ON 
    TOP, THEN SEW SIDES BUT LEAVE 
    BOTTOM  SEAM OPEN;TURN AND PRESS;
    (Option** SEW “MADE BY ____” TAG ON 
     CENTER POCKET-  NOW IF DESIRED).


7. PLACE POCKET (UPSIDE DOWN AND WITH 
    THE "FOLD" EXTENDING BELOW THE 
    BOTTOM OF THE PURSE BOTTOM
   FABRIC) PLACE IT  1” ABOVE THE TOP OF
   “BOTTOM” CORNER ON LINING (RIGHT SIDE) 
    AND STITCH ACROSS THE BOTTOM; 
    THEN FOLD UP TOWARDS THE TOP OF THE 
     LINING AND STITCH BOTH SIDES CLOSED , 
     LEAVING TOP (FOLDED EDGE) OPEN;   
    NOW, MEASURE 3 ½” FROM EACH SIDE OF
   POCKET, STITCH TWICE (UP; THEN DOWN)   
   TO CREATE 3 POCKETS

8.  SEW LININGS (RIGHT SIDES TOGETHER)
     IN SAME ORDER AS THE FABRIC 
     (REPEAT # 2, 3 & 4)  ; PRESS OUT SEAMS;
     DO NOT TURN; SLIP LINING INSIDE PURSE 
     AND MATCH SIDE SEAMS WITH PIN IN THE 
     MIDDLE OF EACH  SIDE SEAM ;

STRAPS AND FINISHING:

9. MEASURE 3 ½” IN FROM EACH FINISHED SIDE 
    SEAM (THIS  WILL MARK YOUR HANDLE 
    PLACEMENTS), AND MARK; 
      REPEAT FOR OTHER SIDE OF PURSE; 
      CUT WEBBING IN TWO EQUAL LENGTHS
     (TO SUIT YOU)  AND ZIG ZAG RAW ENDS;
      FIT  BETWEEN MARKS AND PLACE  RAW 
      EDGE (TOWARDS TOP OF PURSE) AND 
       STITCH ACROSS  HANDLES ABOUT 1" 
       FROM TOP OF PURSE (** BE SURE 
       HANDLES WILL LAY FLAT**); 
      ( 4 TIMES ACROSS FOR STRENGTH!!)

     10: FOLD UNDER BOTTOM RAW EDGES 
          OF PURSE FABRIC AND LINING FABRIC
          (BOTH TO THE INSIDE SO THEY MEET) 
          AND TOP  STITCH AROUND TOP OF  PURSE
                                     
                                           OPTIONAL:

11.  PUT ZIPPER FOOT ON MACHINE; ADD 
       BEADS  AND/OR TRIM AT TOP  STITCH 
       LINE IF DESIRED


Saturday, March 10, 2012

St. Patrick's Day quilt FINISHED, YAY!


Here is a little fun quilt I made with a St. Patrick's Day theme. I tried my hand at mitered corners for the first time and in a very non traditional way of doing them, geez, I'm not even sure I could do them the same way again, LOL !

It was a fun project.... hmmmmm....now to move on.... we have rain in the weather forecast for all this next week.... let me see now.....what can I create next? As the brain turns..... lol ... I'll be back....

Tuesday, February 21, 2012

New purse made.... Puppy Style!


Okay, I need a diversionary day from slipper making so I remembered seeing this cute fabric in my stash a couple of days ago and this idea came to my mind... so today I made my "Puppy Purse", LOL!! It doesn't look like my Poodle Tinkerbelle but she says I'm forgiven anyway...."whew"; thats a load off my mind!

More cozy slippers


I had so much fun making these slippers (ahemm... after redrafting the pattern) I decided to make some to fit "me", LOL.

So here they are and finally... they're DONE!

Now off to do something different....my short attention span is now burned out on slippers.... for a while, anyway.

Wednesday, February 15, 2012

Cozy little slippers


I need a new pair of slippers... necessity was the mother of invention, right? Right. So this time (drum roll please...) I actually bought a pattern! WELL..... I won't tell you the name or company or place where I bought it because I'm going to complain about it (lol)... it had 3 "poorlys": 1) Poorly sized, 2) Poorly written and 3) Poorly designed....that's it, I'm done. SO.... I made it a second time (with major major major adjustments (that's 3 adjustments for the 3 poorlys) and this time, got a cute little pair of slippers. I used cotton for the outside, fleece for the lining and added little yoyo-s (they tell me you should not hypenate yo-yo! to be correct ??) and back to the button stash. This time I found two little matching pink heart buttons to top them off. Oh, I forgot ....that non-skid stuff on the soles is the soft rubbery shelf liner stuff and I got mine at the dollar store in a roll.

Now remember I said "Poorly sized"? Yep, I did. Since I didn't adjust quite enough... I took them to DD Tami and said "aren't these cute" (I'm pretty convincing at my age...had a lot of practice), "here, model them for me" (see, her foot is smaller than mine) and she did....aren't they cute ON HER? She loved them (as she twisted her little feet around) so I said "Happy Valentine's Day"... and gave them to her. She politely said "Ohhh, for ME?" I had fun with it and she has new slippers.

I still need a pair of slippers.... I should have posted a picture of my old ones so you would understand how desperate I am... they had two major blowouts; one on the left front (toe) and another on the right rear (heel)....now to make me a pair large enough to fit (hopefully)!

Easter bag.... tired of WalMart trips


Ruffles, did someone say "ruffles"? Well I'm thinking if I can do a bag with horizontal ruffles (round and round, right?) why not a bag with VERTICAL ruffles (as in...up and down!).. WHY NOT? OK, Easter is coming.... oh my... hurry up. Let me see now, run to my stash, find pastel fabrics and oh gee I have this little piece of "bunny fabric"...oh how SEW-perfect is that? Now to whip up my basic bag, turn strips into ruffles, make a loop and now I run to my button stash (yes, I DO have a button stash too!) and find this cutesie little wooden pastel button in the shape of a flower and WALLA! finished bag in time for Easter too! Whew, I'm on a roll..... but I'm sure getting tired of going to WalMart just to carry my bags! LOL


I have to make a shopping list....let me see now, what all do I need? Yep, gotta' go to WalMart....I'd rather show my new purse to them that at the Doctor's office... got to get sick to go there and Lord knows, I don't have time to get sick nor do I want to! See if I don't hurry up and carry this purse (now that Valentine is past) I won't be ready to carry the Easter purse in time! LOL !!

See I saw this really cute ruffled bag (somewhere...can't recall...no telling where I was,...I do get around 'ya know) and thought "how cute, I'd like to have one of those"...followed by "I can make that"... and so here it is... the little ruffled bag in honor of St. Patrick's Day!! I'm luvin' her!

Valentine Quilt progression


Here are some progressive shots of the quilt as-you-go Valentine project (my first quilt BTW); it was FUN!

OK so I decided to make a little quilt....just a little "throw" mind you, nothing fancy, nothing too big...after all, this is my very first attempt at a quilt-as-you-go by machine piece.... let's keep it simple. Yeah, right. See with me, its all about ideas in my head, a vision, a dream...sometimes a nightmare in disguise! I don't use patterns much (maybe I SHOULD!) so I just set out to go where angels fear to trod... and the path can get really strange, LOL.

Anyway, the bloomin' thing just grew and grew... until it covers a double or queen size bed...don't know HOW that happened but it did. So here is the FMQ, quilt-as-you-go Valentine quilt, for what its worth! I chose three solid colors (glittery, yep I'm all about the BLING) and two red prints with a third one added for the two squares framing the center appliqued heart square..... keep it simple, remember?

Stay tuned and I'll share my two new bags made with the "wing-it-method"... LOL.
Oh and the slippers made from a pattern that was SO very convoluted that I had to almost-wing-it to make them (I think that's why I don't use patterns; I can convolute things on my own, thank you very much!).

Fabrics and thread for Valentine quilt project


Thursday, August 11, 2011

The gorgeous Pheasant from 1901 !!


A raving beauty among the thorns! Here is my precious Pheasant whose Mom was also Singer but she was born in 1901!! Imagine, 110 years old, wow. Now being the "older" sister, she got preference and chose the first "bed" (cabinet) I found. Don't get me wrong, she DEFINITELY deserves this cabinet and all its splendor as she is the Queen of Machines and looks like one sitting high upon this throne! I am in love with her!

I must be a collector; otherwise I have no defense!


Here is a photo of one of my newly acquired little girls, she is called a Sphynx but I call her beautiful. Singer is her Mom and she was born in 1912 according to her serial number. Wow, to be that old and so well preserved, I should be so lucky!! I don't yet have a bed (cabinet) for her to sleep in but I'm on the hunt for one as pretty as she deserves and in the meantime she is patiently waiting.

Wednesday, March 30, 2011

New things for the NEW YEAR.....


Okay, the new year is almost three months old; so is my motivation, lol!

I haven't been sewing but I have been attempting (mind you I said "attempting) my hand at jewelry making. Now having a DD who is really good at this is a bit intimidating to start with, having to buy supplies (yes I'm prone to excesses) secondly and thirdly being old enough to need 2.00 reading glasses (at least I find them at the dollar store.... that leaves more money for buying beads, crystals and something they call "findings") this means nothing more than I have three strikes against me before I even begin, right? Ahhhh but I have never been deterred by a small amount of adversity so HEREeeeeeeeeeeeee I go anyway.

Tried my hand at a necklace with matching earrings and then made another (after staring and smiling at first one). Then decided second one was a bit better, first one needed help.....in this case "help" means you cut the wire, remove all the beads and DO IT OVER ! YEP, me the "I don't like to redo it girl" did just that. See the flower center focal piece just kind of lopped out at you, like a little rabbit who was too sick to stand on its own...oh well, lousy comparison but I discovered during the making of the second one that if you criss cross the wires THROUGH the focal flower or bead, the two strands like each other better and they come together for the common good of all, lol.

SO I "fixed" number one and now I'm off to some new challenge, trying to make a flower petal out of some round mother-of-pearl chips with beads....can't find a pattern and can't figure out how to make it lay right.... sigh *****.... pursue, pursue, pursue.... On the left we have the first attempt (BEFORE the FIX !) and on the right we have the second set....

Fear not! I SHALL RETURN !!! (uhhhh, whenever....)

Sunday, January 2, 2011

HAPPY NEW YEAR !

Happy New Year to everyone and I sincerely hope everyone has a great year in 2011.

Our Christmas Holiday was very unusual this year as we lost my Dad on December 22, 2010. We will miss him but we "REJOICE" at his new address.... HEAVEN is now his home!
He spent the last nine years of his life in a nursing home and I know he is much happier now. My Mom is 91 and they missed their 73rd Anniversary by a mere 6 hours. We told Mom that we are "giving" her that one. She is still staying with me due to some Blood Pressure issues but is doing as well as can be for the time being.

That aside, I haven't had much time to do any sewing or playing but alas and beware, I am MOO-ving in that direction !! AHAaaaaa... all those little ideas are beginning to spin around inside my head... think I'm going to pick up the BIG bunch of squares I cut out last year for a Valentine throw and perhaps "throw" that together in time for Valentines Day 2011! Sounds like a good place to start if you ask me, right? RIGHT!

I'll be back..... sooner than you think... LOL !! Now HAPPY SEWING TO ALL and to ALL A GOOD NIGHT !!

Wednesday, September 8, 2010

Here I am again! Not gone as long this time.....


Ok. I went to JoAnn's craft and fabric store for a stroll through the fabric and saw this darling pumpkin stack that was priced somewhere around $30. I thought (don't we all!) "gee, I can make that" (LOL) and so home I went, dove into the stash like the cat lookin' for a mouse in the hayfield and came up with a few small pieces of Halloween colored prints and WALLA! I was off to the races....hmmmm,let me see now, how did that look? Ok, senior moment, forgot exactly...go online, look at JoAnn's website, AHAaaaa, there it is; print picture, pin it to the wall above the cutting table and away I go. You've figured out by now that I have no pattern, RIGHT? Right.

He (she?) turned out pretty much BIGGER than the one at the store, my Spider was a really fun, used yarn (fun fur type) and made loopies for her legs, oh, and did you see those little "beady" eyes? HA! A couple of colored seed beads did the trick. I used multicolored thread for the stitching around the pumpkin's eyes, mouth and nose (noses?-well there are three of them!)

Ok, serged around the edges, put 'em all together and Uh-Oh...what about that hat? And the brim is supposed to "stand out"? Oh dear. Got out some really heavy interfacing, drew on it, cut it out, used it for pattern to cut the fabric, ok, yes, its REAL stiff, now for the hat part...oh yeah, and the band. Say WHAT? Ok, hat part should be able to cut it using template from FAT CAT quilt ( it worked) and a wide strip of fabric for the band, now "ease" all together. But wait, I need to embroider something on the band. Chose a little ghost/halloween design; once accomplished, put it all together and here she is! Whew!!

Monday, August 9, 2010

New purses to carry....oh where to go??


Well at last I have actually been busy enough to post a couple of new purses here (yes, it seems that I'm either "in a rut" or "on a roll" but I'll worry about that later. Right now... fun fun fun, sew sew sew, and then where oh where shall I go to carry my new bags? I will need to go somewhere everyday if I keep this up, three new purses in the last 4 days, WOW ! Whew!!

A friend call yesterday and said "what ya doin"? (Texans never pronounce all of the word ya see) and I said "making a purse". "WHAT she replies, like you NEED another purse" (color me grinning) as I said "Its not about NEED"! Nope, if I want another one I'll make another one...now I'm going to have a garage sale in a few weeks (waiting for a cooler temperature; been 100 here and thats TOO hot) so I really need to weed out the closet and make a decision which handbags to part with...hmmmm,....or CAN I? Oh well, I'll worry about that later too.

Here are some pictures of the latest two purses. The "autumn" bag is foundation pieced using a modified dresden plate template and then quilted on my Janome 6600 (using mode 3 stitch 45) with a variaged thread in the needle. I made a wide binding for the top edge and the candy corn looks good enough to take a bite, lol!

The second bag I call the PinkBag is a cotton patchwork printed fabric of lime green, white, pink and a bit of turquoise. I quilted around the patchwork design(s) of the fabric with hot pink thread (using mode 2 stitch 47) and then decided to have a go at doing some embellishing on the pattern using seed beads. Hopefully that shows well enough in the photos to be seen.

Now I guess I'll have to go to Wally World to carry the purses; how many trips to WW can I make?